Infiltration issue 2
|
{{#if: Infiltration issue 3|»}} | |||||||||||||||||||||||||||||||||||||||||||||||||||||||||||||||||||||||||||||||||||||||||||||||||||||||||||||||||||||||||||||||||||||||||||||||||||||||||||||||||||||||||||||||||||||||||||||||||||||||||||||||||||||||||||||||||||||||||||||||||||||||||||||||||||||||||||||||||
| {{#if: |[[|«]]}} | {{#if: |[[|»]]}} | |||||||||||||||||||||||||||||||||||||||||||||||||||||||||||||||||||||||||||||||||||||||||||||||||||||||||||||||||||||||||||||||||||||||||||||||||||||||||||||||||||||||||||||||||||||||||||||||||||||||||||||||||||||||||||||||||||||||||||||||||||||||||||||||||||||||||||||||||
| {{#if: |[[|«]]}} | {{#if: |[[|»]]}} | |||||||||||||||||||||||||||||||||||||||||||||||||||||||||||||||||||||||||||||||||||||||||||||||||||||||||||||||||||||||||||||||||||||||||||||||||||||||||||||||||||||||||||||||||||||||||||||||||||||||||||||||||||||||||||||||||||||||||||||||||||||||||||||||||||||||||||||||||
| {{#if: |[[|«]]}} | {{#if: |[[|»]]}} | |||||||||||||||||||||||||||||||||||||||||||||||||||||||||||||||||||||||||||||||||||||||||||||||||||||||||||||||||||||||||||||||||||||||||||||||||||||||||||||||||||||||||||||||||||||||||||||||||||||||||||||||||||||||||||||||||||||||||||||||||||||||||||||||||||||||||||||||||
|-
{{#if: Infiltration_2b.jpg |
| colspan="2" style="font-size: 12px; background-color:#ffffff;" align="center" |  {{#if: Don't look up! |
Don't look up!}}}}
|-
|colspan="2" style="font-size: 14px; background-color:#e7d492; color:black;font-weight:bold;" align="center" | {{#if: |
(')}} {{#if:|
""}}
}}
|-
{{#if: IDW Publishing |
|Publisher || IDW Publishing}}
|-
{{#if: |
|Published by || }}
|-
{{#if: |
|Imprint || }}
|-
{{#if: |
|Published in || }}
|-
{{#if: February 8, 2006 |
|First published || February 8, 2006}}
|-
{{#if: |
|Shipping date || }}
|-
{{#if: |
|On-sale date || }}
|-
{{#if: February 2006 |
|Cover date || February 2006}}
|-
{{#if: |
|Credits || }}
|-
{{#if: |
|By || }}
|-
{{#if: |
|Manga || }}
|-
{{#if: |
|Manga by || }}
|-
{{#if: |
|Original story || }}
|-
{{#if: |
|Story & art by || }}
|-
{{#if: |
|Story and color art || }}
|-
{{#if: |
|Story || }}
|-
{{#if: |
|Story by || }}
|-
{{#if: |
|Story consultants || }}
|-
{{#if: |
|Story concept || }}
|-
{{#if: |
|Screenplay by || }}
|-
{{#if: |
|Screenplay || }}
|-
{{#if: |
|Adaptation by || }}
|-
{{#if: |
|Adapted by || }}
|-
{{#if: |
|Adaptation || }}
|-
{{#if: |
|Based on || }}
|-
{{#if: |
|Writer || }}
|-
{{#if: |
|Writers || }}
|-
{{#if: |
|Writing || }}
|-
{{#if: Simon Furman |
|Written by || Simon Furman}}
|-
{{#if: |
|Written & art || }}
|-
{{#if: |
|Plotter || }}
|-
{{#if: |
|Plotters || }}
|-
{{#if: |
|Plot || }}
|-
{{#if: |
|Plot by || }}
|-
{{#if: |
|Plot/Script || }}
|-
{{#if: |
|Scripter || }}
|-
{{#if: |
|Scripters || }}
|-
{{#if: |
|Script || }}
|-
{{#if: |
|Scripting || }}
|-
{{#if: |
|Script by || }}
|-
{{#if: |
|Script and art || }}
|-
{{#if: |
|Sript [sic] consultant || }}
|-
{{#if: |
|Translation by || }}
|-
{{#if: |
|Artist || }}
|-
{{#if: |
|Comic artist || }}
|-
{{#if: |
|Artists || }}
|-
{{#if: |
|Art || }}
|-
{{#if: E. J. Su |
|Art by || E. J. Su}}
|-
{{#if: |
|Additional art by || }}
|-
{{#if: |
|Flashback art by || }}
|-
{{#if: |
|Art assistant || }}
|-
{{#if: |
|Art assist by || }}
|-
{{#if: |
|Line-art || }}
|-
{{#if: |
|Line-art by || }}
|-
{{#if: |
|Line art by || }}
|-
{{#if: |
|Penciller || }}
|-
{{#if: |
|Pencillers || }}
|-
{{#if: |
|Penciler || }}
|-
{{#if: |
|Pencilers || }}
|-
{{#if: |
|Pencil art || }}
|-
{{#if: |
|Pencils || }}
|-
{{#if: |
|Pencils by || }}
|-
{{#if: |
|Penciled by || }}
|-
{{#if: |
|Penciling || }}
|-
{{#if: |
|Guest penciler || }}
|-
{{#if: |
|Layouts || }}
|-
{{#if: |
|Pencil breakdowns || }}
|-
{{#if: |
|Breakdowns || }}
|-
{{#if: |
|Breakdowns by || }}
|-
{{#if: |
|Illustration || }}
|-
{{#if: |
|Illustrations || }}
|-
{{#if: |
|Illustrator || }}
|-
{{#if: |
|Illustrated by || }}
|-
{{#if: |
|Illustration by || }}
|-
{{#if: |
|Illustrations by || }}
|-
{{#if: |
|Finished pencils || }}
|-
{{#if: |
|Finishes || }}
|-
{{#if: |
|Finished art || }}
|-
{{#if: |
|Finishes by || }}
|-
{{#if: |
|Inker || }}
|-
{{#if: |
|Guest inker || }}
|-
{{#if: |
|Inkers || }}
|-
{{#if: |
|Inks || }}
|-
{{#if: |
|Inks by || }}
|-
{{#if: |
|Ink finishes || }}
|-
{{#if: |
|Ink assist by || }}
|-
{{#if: |
|Additional inks || }}
|-
{{#if: |
|Inking || }}
|-
{{#if: |
|Backgrounds || }}
|-
{{#if: |
|Backgrounds by || }}
|-
{{#if: |
|Colorist || }}
|-
{{#if: |
|Colorists || }}
|-
{{#if: |
|Colourist || }}
|-
{{#if: |
|Colourists || }}
|-
{{#if: |
|Color || }}
|-
{{#if: |
|Colors || }}
|-
{{#if: |
|Color art || }}
|-
{{#if: |
|Colour || }}
|-
{{#if: |
|Colours || }}
|-
{{#if: |
|Colored by || }}
|-
{{#if: |
|Color by || }}
|-
{{#if: John Rauch |
|Colors by || John Rauch}}
|-
{{#if: |
|Color art by || }}
|-
{{#if: |
|Colors assist by || }}
|-
{{#if: |
|Color assists || }}
|-
{{#if: |
|Color assistance by || }}
|-
{{#if: |
|Additional colors || }}
|-
{{#if: |
|Additional colors by || }}
|-
{{#if: |
|Color assist by || }}
|-
{{#if: |
|Colour/Computer FX || }}
|-
{{#if: |
|Computer coloring/effects || }}
|-
{{#if: |
|Color Reconstruction || }}
|-
{{#if: |
|Flats || }}
|-
{{#if: |
|Flats by || }}
|-
{{#if: |
|MTMTE Profiles || }}
|-
{{#if: |
|Letterer || }}
|-
{{#if: |
|Letterers || }}
|-
{{#if: |
|Lettering || }}
|-
{{#if: |
|Letters || }}
|-
{{#if: Tom B. Long |
|Letters by || Tom B. Long}}
|-
{{#if: |
|Lettered by || }}
|-
{{#if: |
|Lettering|Production || }}
|-
{{#if: |
|Special Thanks{{#if: | To}} || }}
|-
{{#if: |
|Collaborators || }}
|-
{{#if: |
|Contributors || }}
|-
{{#if: |
|Editor || }}
|-
{{#if: |
|Editors || }}
|-
{{#if: |
|Editing || }}
|-
{{#if: Chris Ryall & Dan Taylor |
|Edits by || Chris Ryall & Dan Taylor}}
|-
{{#if: |
|Compiled and Edited by || }}
|-
{{#if: |
|Original series editor || }}
|-
{{#if: |
|Original Edits by || }}
|-
{{#if: |
|Deputy editor || }}
|-
{{#if: |
|Assistant editor || }}
|-
{{#if: |
|Editorial assistant{{#if: |s}} || }}
|-
{{#if: |
|Editorial Assistance
provided by || }}
|-
{{#if: |
|Senior editor || }}
|-
{{#if: |
|Associate editor || }}
|-
{{#if: |
|Story consultant || }}
|-
{{#if: |
|Project manager || }}
|-
{{#if: |
|Production by || }}
|-
{{#if: |
|Designer || }}
|-
{{#if: |
|Design by || }}
|-
{{#if: |
|Designed by || }}
|-
{{#if: |
|Design/editorial || }}
|-
{{#if: |
|Book design by || }}
|-
{{#if: |
|Collection designer || }}
|-
{{#if: |
|Collection editor || }}
|-
{{#if: |
|Collection Edits by || }}
|-
{{#if: |
|Graphic design || }}
|-
{{#if: |
|Graphic design by || }}
|-
{{#if: |
|Collection Design by || }}
|-
{{#if: |
|Creative Director{{#if: | / Layout}} || }}
|-
{{#if: |
|Contributing editors || }}
|-
{{#if: |
|Research editor{{#if: |s}} || }}
|-
{{#if: |
|Managing editor || }}
|-
{{#if: |
|{{#if: |Editor-in-chief|Editor in chief}} || }}
|-
{{#if: |
|Editorial consultant || }}
|-
{{#if: |
|Dinosaur consultant || }}
|-
{{#if: |
|Publishing manager || }}
|-
{{#if: |
|Cover || }}
|-
{{#if: |
|Cover art{{#if: |ist}}{{#if: | by}} || }}
|-
{{#if: |
|Cover Design {{#if: |and Elements }}by || }}
|-
{{#if: |
|Inside cover || }}
|-
{{#if: |
|Apologies to || }}
|-
{{#if: IDW continuity |
|Continuity || IDW continuity}}
|-
{{#if: Infiltration |
|Chronology || Infiltration}}
|-
{{#if: |
|ISBN || }}
|-
{{#if: |
|TPB ISBN || ISBN }}
|-
{{#if: |
|UPC || }}
|-
{{#if: |
|Page count || }}
|-
{{#if: |
|Price || }}
|-
{{#if: |
|Packaged with || }}
|-
{{#if: |
|Printed in || }}
|-
{{#if: |
|Animation || }}
|-
{{#if: |
|Music || }}
|}{{#switch:{{#sub:xx|2|14}}|dark cybertron=}}
Ratchet reaches safety with the Autobots, or does he?
Synopsis

Confronted by two menacing robots, the stunned Verity Carlo, Hunter O'Nion, and Jimmy Pink can only stand and gawk as the ambulance driver disappears in a blaze of electricity. That blaze stuns one of the robots, sending it into the garage wall and scattering concrete everywhere. The ambulance itself transforms into a third giant robot, who shields the three humans from the rubble. As the white robot draws a weapon, the third robot deploys an ink spray, blinding his attacker, then transforms back into an ambulance once again and orders the three humans inside. As the ambulance peels out, Jimmy laments the destruction of his garage.
Back in the wilds of Arizona, a police detachment finds the dead body of the mustached businessman. He has no I.D., but one of the officers recognizes him and makes a phone call to a group of people in a boardroom to report the death. Behind them, the wall is adorned with a massive "M".
Traveling on a crowded freeway, the ambulance is once again picked up by the blue jet fighter and narrowly avoids a pile-up caused by the jet's sonic boom. This allows the two sports cars—who identify themselves as Runamuck and Runabout—to catch up, partially transforming to deploy weapons. According to the ambulance, this is a very disturbing sign, as Decepticons never break cover, let alone in such a brazen fashion.
In Oregon, Starscream and Blitzwing marvel at the ore that they have discovered. They anticipate refining more, and getting some kind of unfriendly response for breaking protocol.
Some more fancy driving allows the ambulance to shake Runamuck and Runabout. Verity, who on top of fleeing for her life has had reality turned upside down on her, screams for them to stop and jumps out.
While Jimmy goes to calm her down, Hunter tries to pry more detail out of the ambulance—starting with its name, Ratchet—but before he can get far, the jet re-acquires them. With everyone back inside, Ratchet pours on a burst of speed. In the middle of the desert, three more cars with weapons that spring from hidden compartments appear in their path and shoot the plane down. These cars then transform, draw weapons, and the leader informs Ratchet of the statutes of the Autobot Code of Interplanetary Conflict that he has violated. In his defense, Ratchet offers only two words: Siege Mode...
Featured characters
{{#if: ||(Numbers indicate order of appearance.)}}
- Ironhide (12)
- Prowl (13)
- Sunstreaker (14)|
- Ironhide (12)
- Prowl (13)
- Sunstreaker (14)|| style="background:#ffdddd;" valign="top" |
- Ratchet (5)
- Ironhide (12)
- Prowl (13)
- Sunstreaker (14) }}{{#if:* Runabout (1)
- Runamuck (6)
- Thundercracker (9)
- Starscream (10)
- Blitzwing (11)|
Autobots }}{{#if:* Runabout (1)
|
Decepticons }}{{#if:* Hunter O'Nion (2)
|
Humans }}{{#if:| | Others }}{{#if:| | Misc }}{{#if:| | Misc }} |
|---|---|---|---|---|---|
|
|
}}{{#if:|
|
}}{{#if:|
|
}} |
Notes
- The truck that rams the Battlechargers may be a reference to Laser Optimus Prime.
- As with last issue, we see that all Transformers feature heavy (retractable) armament in vehicle mode. Runabout, Runamuck and Sunstreaker have missiles, Ironhide has a roof mounted cannon, and Prowl has machine-guns behind his headlamps. Also, in addition to the weapons shown last issue, Ratchet has a turbo-booster. They are all hardcore.
- The "Decepticomments" section featured mail answered by Chris Ryall and short ads for next month's issues: Infiltration #3, The Gathering #2, Generations #1 and the War and Peace reprint.
Covers (7)
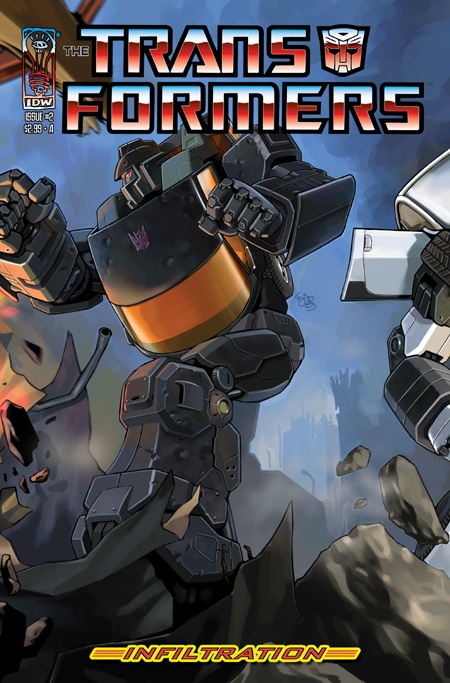
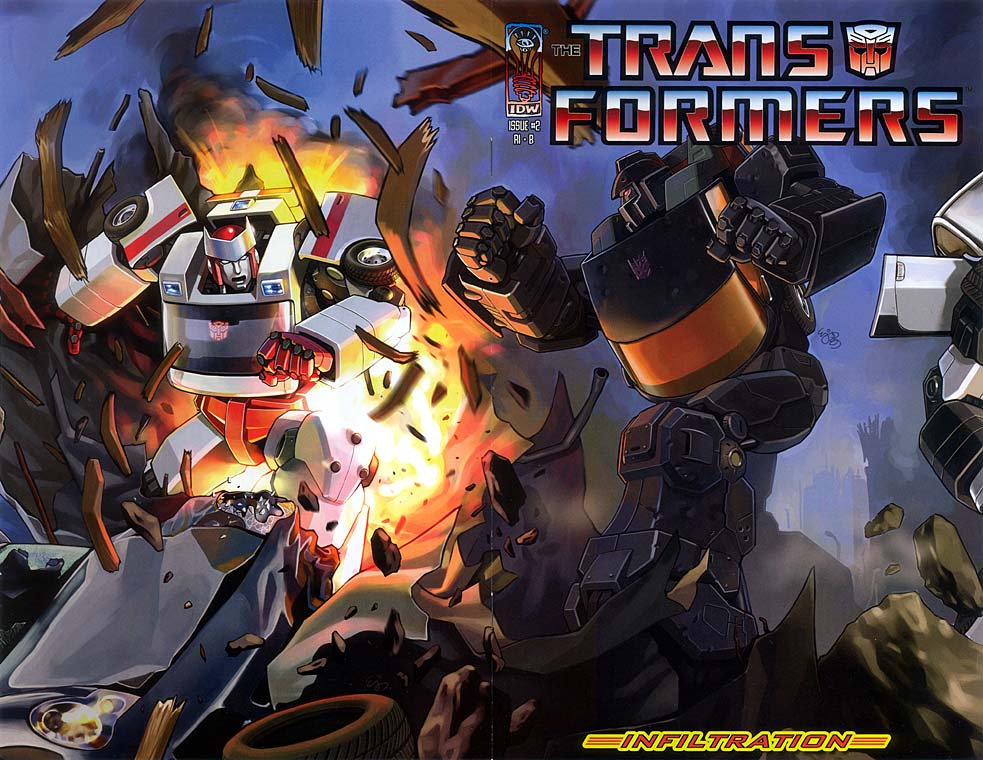
- Cover A: The Battlechargers by E. J. Su; half of the RI-B cover.
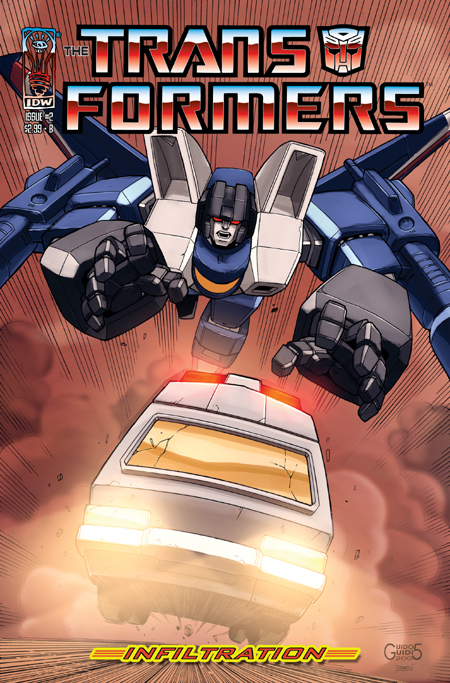
- Cover B: Thundercracker attacks Ratchet; art by Guido Guidi.
- Cover C: Prowl threatens Ratchet; art by Andrew Wildman.
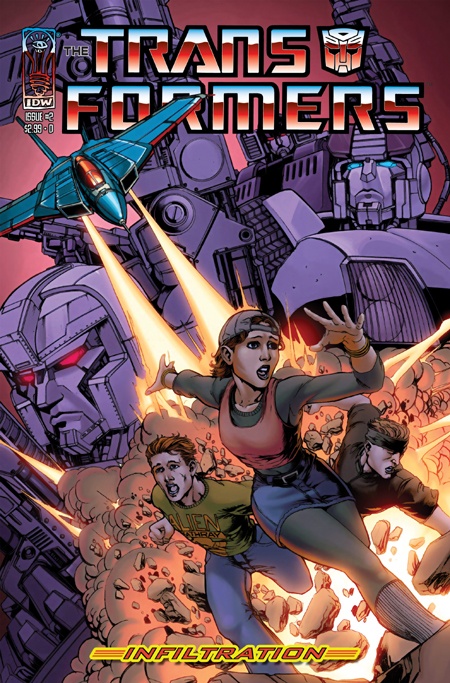
- Cover D: Thundercracker attacks humans; art by James Raiz.
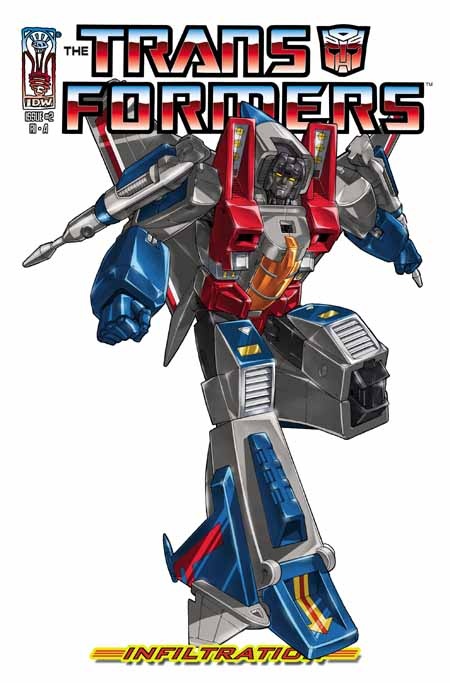
- Cover RI-A: Starscream by Guido Guidi.
- Cover RI-B: Battle wraparound cover by E. J. Su, first part of a continuous image.
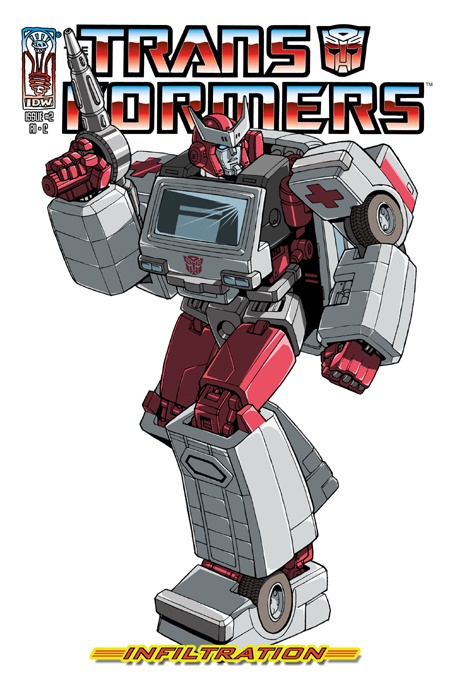
- Cover RI-C: Ratchet by Guido Guidi (includes 3 mini-prints).
-
 Everyone do "The Jerk"!
 -
 Can I have a ride?
 -
 Prowl, being his usual self.
 -
 This will teach those meddling kids!
 -
 Half a conehead.
 -
 Do "The Jerk" and kill the doc!
 -
 If the G1-toy merged with the character model.


Advertisements
- 10th Anniversary Beast Wars toys
- Infiltration #3, including a 2-page B&W sketch preview
- 3-page preview of The Gathering
- Angel: "City Of" scriptbook
- The Gathering (back cover)