G.I. Joe vs. the Transformers II issue 3
| |||||||||||||
 I am big. I am awesome. I am not in this book. | |||||||||||||
| Publisher | Devil's Due Press | ||||||||||||
| First published | November 10, 2004 | ||||||||||||
| Writer | Dan Jolley | ||||||||||||
| Pencilers | Emiliano Santalucia, Guido Guidi | ||||||||||||
| Layouts | Tim Seeley | ||||||||||||
| Inkers | Margeaux Pepoy, Sean Parsons | ||||||||||||
| Colorist | Jeremy Roberts | ||||||||||||
| Letterer | Dreamer Design | ||||||||||||
| Editor | Mark Powers | ||||||||||||
| Graphic design | Mike Norton | ||||||||||||
| Continuity | G.I. Joe vs. the Transformers continuity | ||||||||||||
The Joes are all interested in the future, for that is where they are going to spend the rest of their lives.
Synopsis
[edit]Team three—Barbeque, Spirit, Tomax & Xamot, and Dr. Mindbender—are shocked to realize they're in a post-apocalyptic future. A horde of scouring hovercrafts Sweep across the ruins of a great Earth city. Within seconds, the team is spotted. Ordered to "present themselves for processing", they quickly fall under attack... only to be saved by the Dreadnoks.
The trio looks worse for wear, with some cybernetic replacements, and some very funky-looking alien motorcycles that they "found in a trash heap." They are stunned, as they saw the members of team three die fifteen years before. Explanations follow as the Dreadnoks take them back to their underground base, and their leader... a battered, triple-amputee Duke. Duke doesn't buy their tale; he's only interested in getting new recruits. Sign up or ship out, he tells them. With a mission to carry out, the team chooses the latter.
Mindbender speculates that the other teams were successful, only to have Shockwave seize control of Teletran 3, master the teleportation process, and invade Earth. Torch overhears him, and is quite willing to do what it takes to wipe this future—his nightmare present—from existence.
On Cybertron, Magnus's strength is running out. Cyclonus reports to Shockwave that both the shield and the Autobot will soon fail.
The team and their new allies head back toward the city. They have only one Cybertronian to retrieve. The Dreadnoks explain that he materialized two years ago, and is a fierce warrior. They don't know his name; he's simply "the Autobot". Barbecue notes to Torch that this would be a rare chance to talk shop, but before they get very far, they're besieged by a swarm of Insecticons. Tomax and Xamot reveal a Cybertronian upgrade—their arms mesh, and they unleash powerful blasts, annihilating a number of the clones. It buys enough time for Torch to take out the rest of the swarm with an EMP grenade.

Heading for a forest, the team next encounters a pack of Ravage clones, but just as things are looking grim, they're saved by "the Autobot"—Ratchet.
Ratchet believes their story, but he's too far into the conflict to just walk away. He insists on first getting help with a mission. Shockwave is using human slaves to strip the planet's resources; at a nearby factory, some of the slaves are about to be executed. Ratchet intends to save them, and the team is going to help him before he'll consider the mission.
The rescue mission goes well; Ratchet has become a ferocious fighter. But afterwards, he insist he can't leave. He's become a fighter, a guardian; here he can make a difference, and the gamble that they might yet stop Shockwave's invasion before it happens is too great. He can't do what they're asking.
But Barbecue is done with asking; while Ratchet's back is turned, he slaps the teleporter disk on him, and the group vanishes back into the present day.
...where Ratchet is immediately blasted by Shockwave. Magnus is down, and the Decepticons have taken control. Before the twins can link up again, Shockwave kills one of them, and has Cyclonus take the others prisoner. Shockwave speculates that if he leaves the teleportation gate operational, but blocked from receiving additional travelers, Earth will be consumed by fire — ripe for conquest.
The only hitch is that, in the explosive collapse of Magnus's force field, the humans and the other Autobots escaped. Somewhere below, the Joes planning their next move...
Featured characters
[edit](Numbers indicate order of appearance.)
| Autobots | Decepticons | G.I. Joe | Cobra |
|---|---|---|---|
|
Quotes
[edit]"Look, mate... the last twenty years have been bloody torture. I've lost everything I ever had. Everything I could've had. You say there's a chance you can make it so none of this garbo ever happened? I'm willin' to help."
- —Torch
"You are a good and loyal servant, Cyclonus. Your life is assured for another cycle."
- —Shockwave runs a tight ship.
"Good Lord! Is everyone around me a walking arsenal?"
- —Dr. Mindbender should've gotten an upgrade.
Ratchet: "Help me rescue them. Then we'll talk further about this."
Spirit: "Ratchet—we may not have the time to—"
Ratchet: "Make time. People's lives are at stake. Am I clear?"
Barbecue: "As a bell, sir. ...I can't believe I just called a robot "sir". Looks like we join la revolucion after all, huh?"
Spirit: "Mm. This is not the Ratchet we knew. His time here, alone, fighting—it's changed him. Best to do as he says."
"Ratchet. I always hated you."
- —Shockwave
Notes
[edit]- Earth's invasion took place on August 17, 2014—"Hell Day".
- The team notes that their own time travel was a bit imprecise, landing them over two years past their target date.
- Ratchet has a Road Warrior aura to him, with multiple strapped-on weapons (including his "static laser gun") and other random bits.
- Ratchet isn't seen again in this series, making it unclear if he survived being shot by Shockwave. He shows up briefly in a crowd shot in the next series, however, still sporting his Road Warrior alterations.
- The three Reflector components seen in this issue are based on Reflector's cartoon character model, only colored black. In Reflector's appearances in the "proper" timeline—namely G.I. Joe vs. the Transformers and The Art of War—they are based on their toys.
- This issue features a different brand of awesome than the previous two, but it's still awesome.
Errors
[edit]- There's no trace of the skyscraper-bots promised in the teaser ads and at the end of last issue. They've been replaced by a fleet of Scourge clones.
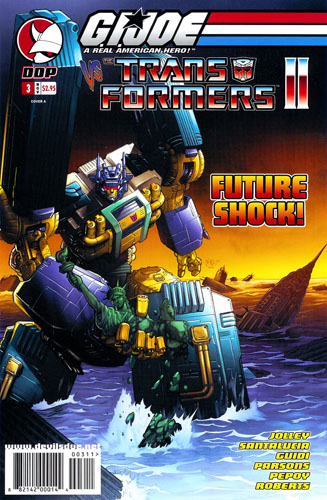
- Like last issue, this one has a bot on the cover that's not in the rest of the book, and then some. In 2015, the Facebook blog Ask Vector Prime would dub this bot Ragnarok, a powerful Decepticon who was shunted from the G.I. Joe vs. the Transformers-verse into a parallel universal stream so that the time-traveling Joes could complete their mission.
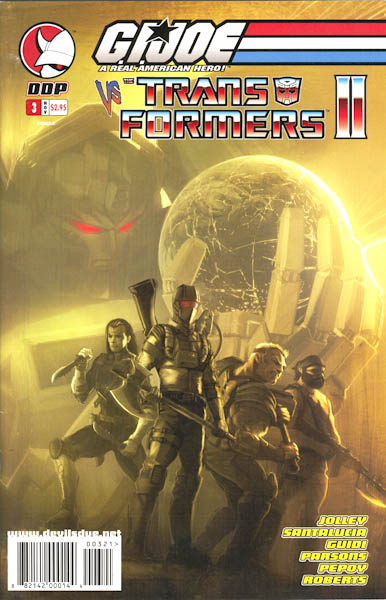
- Cover B has Energon Scorponok clutching the world... a bot from a completely different continuity family, not showing up in the entire crossover series. Still, cool image.
Covers
[edit]-
 Still hasn't appeared anywhere else.
 -
 He's got the whooooole world...

- Cover A: Ragnarok holding the Statue of Liberty by E. J. Su and Jeremy Roberts.
- Cover B: Painting-like image with Energon Scorponok holding the world (in a "normal" hand!), with Barbecue, Spirit and the Dreadnoks in front. Art by Francois Baranger.
- Second Printing: Uncolored, blue-lined version of Cover A.
Advertisements
[edit]- G.I Joe comic reprint and vintage figure pack
- Dreamer Design
- Army of Darkness: Ashes to Ashes #4
- Army of Darkness #1
- G.I. Joe: Reloaded #10
- Displaced@17
- Breakdown #3
- The Blade of Kumori #2
- Defex #3
- G.I. Joe: A Real American Hero #37
- G.I. Joe vs. the Transformers II #4
Reprints
[edit]Other than collections of the full series
- N/A


