Divide and Conquer!: Difference between revisions
mNo edit summary |
mNo edit summary |
||
| Line 18: | Line 18: | ||
|continuity=[[Marvel Comics continuity]]/[[Earthforce]] | |continuity=[[Marvel Comics continuity]]/[[Earthforce]] | ||
}} | }} | ||
'''Starscream and Soundwave experiment in ways to avoid treading on each other's toes.''' | '''Starscream and Soundwave experiment in ways to avoid treading on each other's toes.''' | ||
| Line 48: | Line 47: | ||
*[[Broadside (G1)|Broadside]] (36) | *[[Broadside (G1)|Broadside]] (36) | ||
|c2= | |c2= | ||
{{{!}}border="0" cellpadding="0" cellspacing="0" style="background:transparent" | |||
{{!}}- | |||
{{!}}style="background:transparent;border:0px" valign="top"{{!}} | |||
*[[Mixmaster (G1)|Mixmaster]] (1) | *[[Mixmaster (G1)|Mixmaster]] (1) | ||
*[[Dead End (G1)|Dead End]] (2) | *[[Dead End (G1)|Dead End]] (2) | ||
| Line 55: | Line 57: | ||
*[[Breakdown (G1)|Breakdown]] (6) | *[[Breakdown (G1)|Breakdown]] (6) | ||
*[[Kickback (G1)|Kickback]] (7) | *[[Kickback (G1)|Kickback]] (7) | ||
*[[ | *[[Octane]] (8) | ||
*[[Long Haul (G1)|Long Haul]] (9) | *[[Long Haul (G1)|Long Haul]] (9) | ||
*[[Rampage (G1)|Rampage]] (10) | *[[Rampage (G1)|Rampage]] (10) | ||
| Line 61: | Line 63: | ||
*[[Tantrum (G1)|Tantrum]] (12) | *[[Tantrum (G1)|Tantrum]] (12) | ||
*[[Blitzwing (G1)|Blitzwing]] (13) | *[[Blitzwing (G1)|Blitzwing]] (13) | ||
{{!}}style="background:transparent;border:0px" valign="top"{{!}} | |||
*[[Runabout (G1)|Runabout]] (14) | *[[Runabout (G1)|Runabout]] (14) | ||
*[[Soundwave (G1)/Marvel Comics continuity|Soundwave]] (15) | *[[Soundwave (G1)/Marvel Comics continuity|Soundwave]] (15) | ||
| Line 73: | Line 76: | ||
*[[Hook (G1)|Hook]] (37) | *[[Hook (G1)|Hook]] (37) | ||
*[[Divebomb (G1)|Divebomb]] (38) | *[[Divebomb (G1)|Divebomb]] (38) | ||
{{!}}} | |||
|c3= | |c3= | ||
*Oil tanker skipper (30) | *Oil tanker skipper (30) | ||
| Line 93: | Line 97: | ||
===Back-up Material=== | ===Back-up Material=== | ||
*'''Additional Transformers Story:''' | *'''Additional Transformers Story:''' "[[...All Fall Down!]]" | ||
*'''Other strips:''' ''[[Action Force (comic)|G.I. Joe the Action Force]] - "Cut and Freeze Dried" | *'''Other strips:''' ''[[Action Force (comic)|G.I. Joe the Action Force]]'' - "Cut and Freeze Dried" and ''[[Combat Colin]]'' | ||
*'''[[Transformers AtoZ|AtoZ]]:''' [[Streetwise (G1)|Streetwise]] and [[Sunstreaker (G1)|Sunstreaker]] | *'''[[Transformers AtoZ|AtoZ]]:''' [[Streetwise (G1)|Streetwise]] and [[Sunstreaker (G1)|Sunstreaker]] | ||
| Line 100: | Line 104: | ||
<gallery> | <gallery> | ||
File:MarvelUK-279.jpg|'''Issue #279''' | File:MarvelUK-279.jpg|'''Issue #279''' | ||
File:Titan B&W Compilation-Earthforce.jpg|''' | File:Titan B&W Compilation-Earthforce.jpg|'''''Earthforce'' TPB''' | ||
</gallery> | </gallery> | ||
*'''Issue #279 cover:''' Springer and Starscream duel in the skies, by Bryan Hitch. | *'''Issue #279 cover:''' Springer and Starscream duel in the skies, by Bryan Hitch. | ||
Revision as of 07:07, 4 August 2015
| This article is about the Marvel UK issue. For the episode of the original cartoon, see Divide and Conquer. |
| |||||||||||||

| |||||||||||||
| "Divide and Conquer!" | |||||||||||||
| Publisher | Marvel Comics | ||||||||||||
| First published | 14th July 1990 | ||||||||||||
| Cover date | 21st July 1990 | ||||||||||||
| Writer | Simon Furman | ||||||||||||
| Pencils | Staz | ||||||||||||
| Inks | Michael Eve | ||||||||||||
| Letters | Glib | ||||||||||||
| Cover | Bryan Hitch | ||||||||||||
| Continuity | Marvel Comics continuity/Earthforce | ||||||||||||
Starscream and Soundwave experiment in ways to avoid treading on each other's toes.
Synopsis
Soundwave leads a huge assault on the new Autobot Earthbase, which is vulnerable after the problems encountered with the defence system, and an early strike prevents Wheeljack reactivating them. Grimlock leads the Dinobots in a counter-attack that holds the line but the Autobots are still pinned down. Prowl wonders if this is the plan.
Soundwave is unhappy. Starscream had devised a divide and conquer strategy, but whilst the Decepticons are risking their necks, Starscream has an easy task.
Near the Gulf of Mexico, Starscream has captured an oil tanker. The ship's skipper wants to sink the vessel rather than surrender the fuel, but his radio operator points out the environmental damage a huge oil slick will cause. A distress call is made and they hope someone hears it.
Springer has. Prowl had foreseen the potential for a two-pronged attack and so sent the Survivors on patrol. Springer flies towards the tanker, followed by Inferno, Skids, and Carnivac aboard Broadside in aircraft carrier mode. They rapidly overpower Starscream, who flees, frustrated that his own tactic is being used against him. He radios the other Decepticons to retreat.
As the Decepticons flee, Soundwave comments on how flawed Starscream's plan was and suggests that perhaps he should lead alone. Some Decepticons express support for this idea and Soundwave thinks how a divide and conquer strategy can work after all...
Featured characters
(Numbers indicate order of appearance.)
| Autobots | Decepticons | Humans | ||
|---|---|---|---|---|
|
|
Quotes
Notes
Artwork and technical errors
Continuity errors
Continuity notes
- While Broadside transports the Survivors to the oil tank he takes no part in the battle and remains in aircraft carrier mode. He could be just there as back-up or to house Starscream if he is captured.
Real-life references
Other trivia
Back-up Material
- Additional Transformers Story: "...All Fall Down!"
- Other strips: G.I. Joe the Action Force - "Cut and Freeze Dried" and Combat Colin
- AtoZ: Streetwise and Sunstreaker
Covers (2)
-
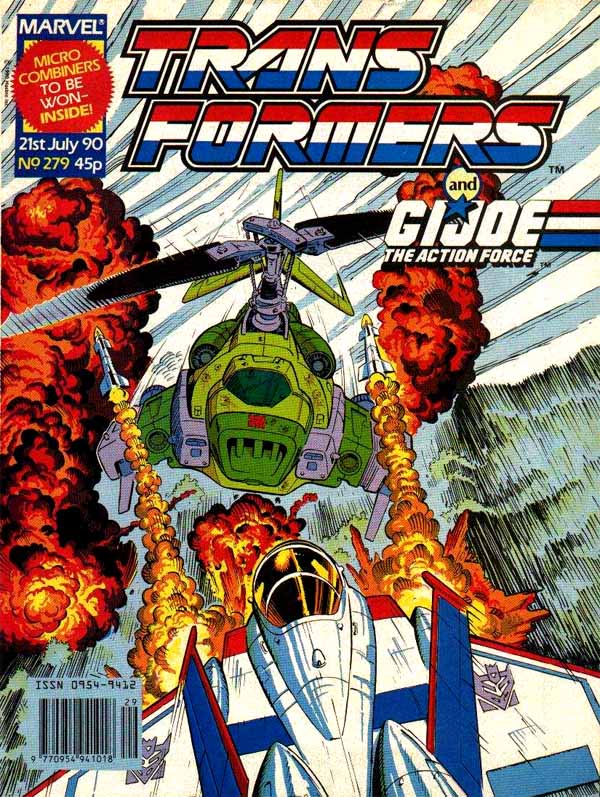 Issue #279
 -
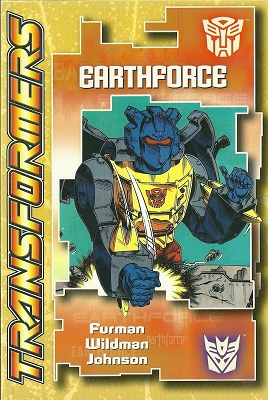 Earthforce TPB

- Issue #279 cover: Springer and Starscream duel in the skies, by Bryan Hitch.
- Earthforce TPB cover: Grimlock thumps a table, by Stephen Baskerville.


