Stick Together: Difference between revisions
m Fixit was never even hinted at being a Gorlamian, this note is useless and poorly written. |
mNo edit summary |
||
| (48 intermediate revisions by 24 users not shown) | |||
| Line 1: | Line 1: | ||
{{Comicstory| | {{Comicstory| | ||
| | |series=rid|issueno=3 | ||
|prev=The World & Everything in It | |prev=The World & Everything in It | ||
|next=Devisive | |next=Devisive | ||
| Line 14: | Line 14: | ||
|letters by=[[Shawn Lee]] | |letters by=[[Shawn Lee]] | ||
|editor=[[Carlos Guzman]] | |editor=[[Carlos Guzman]] | ||
|continuity=[[ | |continuity=[[2005 IDW continuity]] | ||
|chronology=[[IDW timeline|Current era (2012)]] | |chronology=[[2005 IDW timeline|Current era (2012)]] | ||
}} | }} | ||
'''When mysterious explosions begin going off across Cybertron, Wheeljack and Starscream must put aside their differences to find their source and save Iacon.''' | '''When mysterious explosions begin going off across Cybertron, Wheeljack and Starscream must put aside their differences to find their source and save Iacon.''' | ||
==Synopsis== | ==Synopsis== | ||
[[File:StickTogether-Aerialbots.jpg|thumb|left|upright=1.7]] | |||
The [[Aerialbot (G1)|Aerialbots]] arrive at the [[Decepticon]] encampment to perform crowd control while [[Prowl (G1)/2005 IDW continuity|Prowl]]'s security forces remove [[Ratbat (G1)|Ratbat]]'s deceased body. Things start to turn ugly when Prowl makes the unfeasible claim that Ratbat committed suicide, and although [[Starscream (G1)/2005 IDW continuity|Starscream]] backs up the lie, it does little to quell the rowdy Decepticons. [[Dirge (G1)|Dirge]] stalks off, sick and tired of the lies and squabbles, but the idealistic Aerialbot [[Barrel Roll]] follows him, trying to get him to listen to reason and believing that fliers should stick together. Just as he appears to be getting through to Dirge, a gigantic spontaneous explosion destroys Barrel Roll and several others nearby. | |||
[[Bumblebee (G1)/2005 IDW continuity|Bumblebee]] calls on [[Wheeljack (G1)/2005 IDW continuity|Wheeljack]] to analyze the mysterious blast, and the scientist is grateful to get out of his workshop and away from an argument over currency exchange between [[Tappet]] and [[Hipotank]]. As he goes about his work, political tensions are strained even harder: Prowl blames the Decepticons, [[Metalhawk (G1)|Metalhawk]] blames ''everybody'', and Starscream uses the situation to raise issues pertinent to the Decepticons' quality of life. Miffed at Starscream's backhanded altruism, Wheeljack decides to question Dirge, who is recuperating in a medical facility, but the Seeker's fatalistic blame-throwing only serves to aggravate him. Wheeljack's irritation has nothing on [[Silverbolt (G1)|Silverbolt]]'s, however: the Aerialbot leader comes storming into the med-bay, blaming Dirge for Barrel Roll's death and seeking revenge. Intent on studying the mystery from all angles before action is taken, Wheeljack is able to throw off Silverbolt's shot and save the Decepticon. | |||
A second explosion occurs during the night just outside the space port, killing thirty-five more Transformers. Again studying the blast crater, Wheeljack is accused by Starscream of failing in his duties because he is only being reactionary, rather than getting ahead of the problem. Wheeljack scoffs when Starscream claims that he could do some real good if he could get the Seekers back together, and begins listing off the dead, arrested, or MIA members of the squad... and has a brainstorm when he gets to [[Thundercracker (G1)/2005 IDW continuity|Thundercracker]]. Starscream struggles to follow his explanation: with Cybertron alive once more, the planet is now transmitting energy to its moon, reviving it as well, but because the planet has returned to a prehistoric state, at a time when it had ''two'' moons, excess energy is being transmitted that has nowhere to go, coalescing in the atmosphere and superheating it into an explosive burst of plasma akin to ball lightning. Now recognizing what to look for, Wheeljack determines another explosion is coming in the middle of the city. With the blast only minutes away, Starscream scrambles to gather the NAILs in the Decepticons' barracks within the barrel of [[Kimia Facility|Kimia]]'s gun, which will be able to resist the temperatures of the blast if Wheeljack is unable to prevent it. Wheeljack, meanwhile, jury-rigs a set of rockets that he launches into low orbit with help from [[Ironhide (G1)/2005 IDW continuity|Ironhide]], giving the energy charge something to latch on to and allowing it to harmlessly erupt above Cybertron's surface until he can put a permanent satellite in orbit to absorb the energy. [[Arcee (G1)/2005 IDW continuity|Arcee]] watches the cold explosion overhead, and smiles. | |||
Bumblebee, Prowl, Metalhawk, and the others arrive at Wheeljack's location just as everything is calming down. Starscream thanks Wheeljack for saving them, but Wheeljack is quick to point out to Bumblebee that if he had failed to prevent the explosion, it was Starscream's quick thinking that would have saved the NAILs. On Wheeljack's recommendation, Bumblebee agrees to let Starscream join their government—which causes Silverbolt to blow a fuse and furiously strike the little yellow 'bot. Prowl tries to intervene, but is likewise slapped down by the Aerialbot leader, who gathers his men and announces that they are seceding from Bumblebee's government. As all assembled watch them go, Starscream quietly remarks that fliers should stick together, and Bumblebee realizes that the Decepticon genuinely doesn't want them to go. He apologizes for zapping Starscream the previous day, and Starscream assures him he won't regret his decision. | |||
Bumblebee, Prowl, Metalhawk and the others arrive at Wheeljack's location just as everything is calming down. Starscream thanks Wheeljack for saving them, but Wheeljack is quick to point out to Bumblebee that | |||
==Featured characters== | ==Featured characters== | ||
{{Featuredcharacters | {{Featuredcharacters | ||
|c1= | |c1= | ||
*[[Skydive (G1 Aerialbot)|Skydive]] (1) | {{{!}}border="0" cellpadding="0" cellspacing="0" style="background:transparent" | ||
*[[Air Raid (G1)|Air Raid]] (2) | {{!}}- | ||
*[[Fireflight (G1)|Fireflight]] (3) | {{!}}style="background:transparent;border:0px" valign="top"{{!}} | ||
*[[Silverbolt (G1)|Silverbolt]] (4) | * [[Skydive (G1 Aerialbot)|Skydive]] (1) | ||
*[[Slingshot (G1)|Slingshot]] (5) | * [[Air Raid (G1)|Air Raid]] (2) | ||
*[[Barrel Roll]] (6) | * [[Fireflight (G1)|Fireflight]] (3) | ||
*[[Blurr (G1)|Blurr]] (9) | * [[Silverbolt (G1)|Silverbolt]] (4) | ||
*[[Prowl (G1)|Prowl]] (10) | * [[Slingshot (G1)|Slingshot]] (5) | ||
*[[Sideswipe (G1)|Sideswipe]] (12) | * [[Barrel Roll]] (6) | ||
*[[Fixit (G1)|Fixit]] (14) | * [[Blurr (G1)|Blurr]] (9) | ||
*[[Streetwise (G1)|Streetwise]] (16) | * [[Prowl (G1)/2005 IDW continuity|Prowl]] (10) | ||
*[[Wheeljack (G1)|Wheeljack]] (28) | * [[Sideswipe (G1)/2005 IDW continuity|Sideswipe]] (12) | ||
*[[Bumblebee (G1)|Bumblebee]] (29) | * [[Fixit (G1)|Fixit]] (14) | ||
*[[Hot Spot (G1)|Hot Spot]] (30) | {{!}}style="background:transparent;border:0px" valign="top"{{!}} | ||
*[[Scattershot (G1)|Scattershot]] (32) | * [[Streetwise (G1)|Streetwise]] (16) | ||
*[[Hosehead]] ( | * [[Wheeljack (G1)/2005 IDW continuity|Wheeljack]] (28) | ||
*[[Broadside (G1)|Broadside]] ( | * [[Bumblebee (G1)/2005 IDW continuity|Bumblebee]] (29) | ||
*[[Sizzle (G1)|Sizzle]] ( | * [[Hot Spot (G1)|Hot Spot]] (30) | ||
* [[Scattershot (G1)|Scattershot]] (32) | |||
*[[Ironhide (G1)|Ironhide]] ( | * [[Hosehead (G1)|Hosehead]] (37) | ||
* [[Broadside (G1)|Broadside]] (38) | |||
* [[Sizzle (G1)|Sizzle]] (39) | |||
* [[Ironhide (G1)/2005 IDW continuity|Ironhide]] (41) | |||
{{!}}} | |||
|c2= | |c2= | ||
*[[Triggerhappy]] (7) | {{{!}}border="0" cellpadding="0" cellspacing="0" style="background:transparent" | ||
*[[Needlenose]] (8) | {{!}}- | ||
*[[Bombshell (G1)|Bombshell]] (11) | {{!}}style="background:transparent;border:0px" valign="top"{{!}} | ||
*[[Bonecrusher (G1)|Bonecrusher]] (13) | * [[Triggerhappy (G1)|Triggerhappy]] (7) | ||
*[[Ratbat (G1)|Ratbat]] (15) | * [[Needlenose (G1)|Needlenose]] (8) | ||
*[[Mixmaster (G1)|Mixmaster]] (17) | * [[Bombshell (G1)|Bombshell]] (11) | ||
*[[Motormaster (G1)|Motormaster]] (18) | * [[Bonecrusher (G1)|Bonecrusher]] (13) | ||
*[[Hook (G1)|Hook]] (19) | * [[Ratbat (G1)|Ratbat]] (15) | ||
*[[Starscream (G1)|Starscream]] (20) | * [[Mixmaster (G1)|Mixmaster]] (17) | ||
*[[Blot (G1)|Blot]] (21) | * [[Motormaster (G1)|Motormaster]] (18) | ||
*[[Mindwipe (G1)|Mindwipe]] (22) | * [[Hook (G1)|Hook]] (19) | ||
*[[Dirge (G1)|Dirge]] (23) | * [[Starscream (G1)/2005 IDW continuity|Starscream]] (20) | ||
*[[Dead End (G1)|Dead End]] (24) | * [[Blot (G1)|Blot]] (21) | ||
*[[Ransack (G1)|Ransack]] (25) | {{!}}style="background:transparent;border:0px" valign="top"{{!}} | ||
* [[Mindwipe (G1)|Mindwipe]] (22) | |||
* [[Dirge (G1)|Dirge]] (23) | |||
* [[Dead End (G1)|Dead End]] (24) | |||
* [[Ransack (G1)|Ransack]] (25) | |||
{{!}}} | |||
|h3=[[NAIL]]s|c3= | |h3=[[NAIL]]s|c3= | ||
*[[Tappet]] (26) | * [[Tappet]] (26) | ||
*[[Hipotank]] (27) | * [[Hipotank]] (27) | ||
*[[Metalhawk]] (31) | * [[Metalhawk (G1)|Metalhawk]] (31) | ||
* "[[Green Cy-Kill]]" (33) | |||
* Yellow, red, and blue triplets (34-36) | |||
* [[Arcee (G1)/2005 IDW continuity|Arcee]] (40) | |||
}} | }} | ||
==Quotes== | ==Quotes== | ||
"'''Skywarp''' was '''teleporting''' a couple hours ago. Maybe some Decepticon can do '''this'''."<br /> | |||
"Why '''assume''' it was a Decepticon?"<br /> | |||
"'''Gee''', Metalhawk, '''every event''' on '''every day''' of the last '''six million years''' mostly." | |||
:—'''Prowl''' and '''Metalhawk''' look for culprits. | |||
"'''Crony.''' '''He''' called me a crony. Getting called a '''crony''' by '''Starscream''' is like... It's like a simile I'd '''use''' to describe a '''less obviously ironic''' thing." | |||
:—'''Wheeljack''' | |||
"You're '''in''', Starscream. We '''need''' you on our side. And... I'm sorry I zapped you the other day. I should have '''trusted''' you."<br/> | |||
"Well, the '''last''' time an Autobot trusted me, my lies killed '''thousands''' of you. So I '''get''' where you were coming from."<br/> | |||
"Erm..."<br/> | |||
"But thanks for the role in '''our''' government. I'm '''sure''' you won't regret it."<br/> | |||
:—'''Bumblebee''' gives '''Starscream''' the benefit of the doubt and instantly regrets it. | |||
==Notes== | ==Notes== | ||
===Continuity notes=== | |||
*Ratbat was found by Mixmaster stabbed through with a sword, with one arm ripped off and the other pinned to a wall, and Prowl thinks he can call that ''suicide''? | * Ratbat was found by Mixmaster stabbed through with a sword, with one arm ripped off and the other pinned to a wall, and Prowl thinks he can call that ''suicide''? "[[A Better Tomorrow]]" and following issues will make it clear that the Decepticons (and many neutrals) all know Ratbat was really murdered and that this is leaving them disgruntled with the Autobots; Issue [[The End of the Beginning of the World|#11]] hints that Prowl ''wanted'' people to know he had whacked the 'con. | ||
*Dirge was last seen in a flashback in [[All Hail Megatron issue 7|''All Hail Megatron'' #7]], the events of which he recounts here. While he survived the [[Insecticon swarm]], it doesn't sound like we'll be seeing [[Deluge (G2)|Deluge]] again! | * Dirge was last seen in a flashback in [[All Hail Megatron issue 7|''All Hail Megatron'' #7]], the events of which he recounts here. While he survived the [[Insecticon swarm]], it doesn't sound like we'll be seeing [[Deluge (G2)|Deluge]] again! | ||
*A [[sky-sled]] can be spotted mounted on the wall just behind Wheeljack's head in his workshop. This was a fixture of [[Ironfist (G1)|Ironfist]]'s workshop, indicating that Wheeljack accepted the offer to take it over [[Xaaron]] said he was going to make back in "[[Chaos Theory Part 1]]" (and, of course, that the workshop survived the crash of Kimia). | * A [[sky-sled]] can be spotted mounted on the wall just behind Wheeljack's head in his workshop. This was a fixture of [[Ironfist (G1)|Ironfist]]'s workshop, indicating that Wheeljack accepted the offer to take it over [[Xaaron (G1)|Xaaron]] said he was going to make back in "[[Chaos Theory Part 1]]" (and, of course, that the workshop survived the crash of Kimia). | ||
*Among the assembled junk in Wheeljack's workshop is: a computer readout of the [[Kronosphere]] from "[[War Dawn]]", a model of Wheeljack's Cybertronian vehicle mode and a stack of [[conductor|energy conductors]] from "[[More than Meets the Eye, Part 1]]", the green, circular bomb from "[[More than Meets the Eye, Part 2]]", the chunk of [[Meteorini Chipperoni|meteor]] from "[[War of the Dinobots]]", the [[hypno-chip]] nullifier from "[[The Ultimate Doom, Part 3]]", the two designs of the [[cosmitron]] from "[[Divide and Conquer]]", the experimental generator from "[[Masquerade]]" (basically—and not coincidentally, we wager!—all the stuff Wheeljack is fiddling with in the screencaps included in his article on this wiki!), as well as the [[Crystal of Power]] from "[[Fire on the Mountain]]" one of [[Metroplex (G1)|Metroplex]] and/or [[Trypticon (G1)|Trypticon]]'s eyes from "[[Ghost in the Machine]]", which are hidden by a speech balloon in the first panel and only vaguely apparent in the second. Also visible is the head of an R5-series droid from ''[[Star Wars (franchise)|Star Wars]]''. | * [[Ramjet (G1)|Ramjet]] and [[Thrust (G1)|Thrust]]'s deaths are mentioned, from ''[[The Transformers: Spotlight|Spotlights]]'' ''[[Spotlight: Ramjet|Ramjet]]'' and ''[[Ride-Along|Prowl]]'' respectively. | ||
*Fixit might seem odd to see amongst the Protectobots on first impression, given that the team has its own medic in [[First Aid (G1)|First Aid]], but IDW continuity | * Several of the NAILS who die in the second explosion first appeared in the opening crowd scene in issue #1. | ||
* The mysterious loss of one of Cybertron's moons was previously mentioned in ''[[The Transformers: More than Meets the Eye|More than Meets the Eye]]'' [[Liars, A to D Part 1: How to Say Goodbye and Mean It|#1]] and comes up repeatedly in the series. | |||
* A possible explanation for the nature of the energy being released by Cybertron was provided in issue [[Remain in Light 3 of 5: The Divided Self|#19]] of ''[[The Transformers: More than Meets the Eye|More Than Meets the Eye]]''. | |||
===Transformers references=== | |||
* Among the assembled junk in Wheeljack's workshop is: a computer readout of the [[Kronosphere]] from "[[War Dawn (episode)|War Dawn]]", a model of Wheeljack's Cybertronian [[alternate mode|vehicle mode]] and a stack of [[conductor|energy conductors]] from "[[More than Meets the Eye, Part 1]]", the green, circular bomb from "[[More than Meets the Eye, Part 2]]", the chunk of [[Meteorini Chipperoni|meteor]] from "[[War of the Dinobots]]", the [[hypno-chip]] nullifier from "[[The Ultimate Doom, Part 3]]", the two designs of the [[cosmitron]] from "[[Divide and Conquer]]", the experimental generator from "[[Masquerade]]" (basically—and not coincidentally, we wager!—all the stuff Wheeljack is fiddling with in the screencaps included in his article on this wiki!), as well as the [[Crystal of Power]] from "[[Fire on the Mountain (episode)|Fire on the Mountain]]", one of [[Metroplex (G1)|Metroplex]] and/or [[Trypticon (G1)|Trypticon]]'s eyes from "[[Ghost in the Machine (G1)|Ghost in the Machine]]", which are hidden by a speech balloon in the first panel and only vaguely apparent in the second. Also visible is the head of an R5-series droid from ''[[Star Wars (franchise)|Star Wars]]''. | |||
* Colourist Josh Perez continues to color generic characters and objects as homages to other things: the NAIL in the foreground of the medi-bay is colored like the [[GoBots|Tonka ''GoBots'']] character [[Rest-Q (GoBots)|Rest-Q]] while Wheeljack's rocket launcher is colored to resemble [[Omega Supreme (G1)#omegaspreem|Omega Spreem]]. | |||
===Real world references=== | |||
* In page 10, panel 3, Perez colored the bots in the CR chambers after the constituents of the Jungle Fiver combiner from ''{{w|The Bots Master}}''.<ref>{{citesocial|quote=I forget if it was this issue or another, but the bots in the CR Chambers were homages to Jungle Fiver from Bots Masters XD ((looked it up, it's this issue lol)|link=https://twitter.com/dyemooch/status/1157127044104425473|name=Josh Perez|site=Twitter|year=2019|month=08|day=02|(defunct=)}}</ref> | |||
===Other trivia=== | |||
* Unlike the other characters in this series who were in the game, Air Raid does not appear with his ''[[Transformers: War for Cybertron (franchise)|War for Cybertron]]'' design, instead using a different Cybertronian body based on his ''[[Transformers: Generation 2 (franchise)|Generation 2]]'' [[Cyberjet]] stealth bomber [[Air Raid (G1)#Cyberjet|form]]. | |||
* Fixit might seem odd to see amongst the Protectobots on first impression, given that the team has its own medic in [[First Aid (G1)|First Aid]], but at the time, IDW continuity [[The Possible Light|had yet]] to establish them as even ''being'' a team, and in any case, the previous story "[[Bullets]]" has established that First Aid is stationed on another planet at the medical facility [[Delphi]]. | |||
===Foreign localization=== | |||
'''Japanese''' | |||
* ''Title:'' "'''Te o Tsuna ga Neba'''" (手を繋がねば, "Need to Join Hands") | |||
===Covers (3)=== | ===Covers (3)=== | ||
* '''Cover A:''' Wheeljack; art by [[Andrew Griffith]] and [[Josh Perez]] | * '''Cover A:''' Wheeljack; art by [[Andrew Griffith]] and [[Josh Perez]] | ||
* '''Cover B:''' Starscream; art by [[Casey Coller]] and [[Joana Lafuente]], in homage to [[Ed McGuinness]]'s cover to ''[[Superman]]'' #154 | * '''Cover B:''' Starscream; art by [[Casey Coller]] and [[Joana Lafuente]], in homage to [[Ed McGuinness]]'s cover to ''[[Superman]]'' #154. ([[wikia:dc:Superman Vol 2 154|see here]]) | ||
* '''Cover RI:''' Black and white lineart version of Cover A by Andrew Griffith | * '''Cover RI:''' Black and white lineart version of Cover A by Andrew Griffith | ||
<gallery> | <gallery> | ||
File:RID3_cvrA.jpg|The Thinker | |||
File:RID3_cvrB.jpg|The Stinker | |||
File:RID3_cvrRI.jpg|Cover RI | |||
</gallery> | </gallery> | ||
===Advertisements=== | ===Advertisements=== | ||
* ''[[The Transformers: More than Meets the Eye]]'' [[Life After the Big Bang|#4]] | |||
* ''[[Infestation 2]]: [[G.I. Joe (franchise)|G.I. Joe]]'' and ''[[Teenage Mutant Ninja Turtles]]'' | |||
* [[Shout! Factory]] Transformers DVDs | |||
* [[Free Comic Book Day]] | |||
* ''[[The Transformers: Autocracy]]'' | |||
* ''Rocketeer Adventures 2'' | |||
===Reprints=== | |||
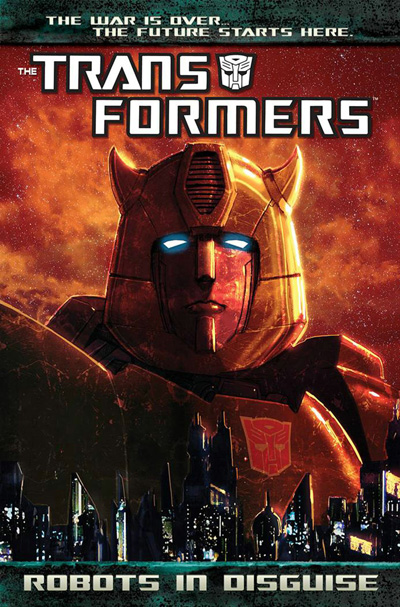
* '''''The Transformers: Robots in Disguise Volume 1''''' <small>([[July 25]], [[2012]]) ISBN 1613772912 / ISBN 978-1613772911</small> | |||
** Collects ''Robots in Disguise'' issues #1–5. | |||
** Bonus material includes art from most covers and notes on issue #3 by the author/artists. | |||
** Trade paperback format. | |||
* '''''The Transformers: Robots in Disguise Volume 1''''' (Reissue) <small>([[May 21]], [[2014]]) ISBN 161377964X / ISBN 978-1613779644</small> | |||
** Collects ''Robots in Disguise'' issues #1–5. | |||
** New cover by Livio Ramondelli. | |||
** Bonus material includes cover gallery and notes on issue 3 by Barber, Griffith, and Josh Perez. | |||
** Trade paperback format. | |||
* '''''[[The Transformers: The IDW Collection Phase Two: Volume 1]]''''' <small>([[September 3]], 2014) ISBN 1631400401 / ISBN 978-1631400407</small> | |||
** Collects ''[[Transformers: The Death of Optimus Prime|The Death of Optimus Prime]]'', ''[[The Transformers: More than Meets the Eye|More than Meets the Eye]]'' issues [[Liars, A to D Part 1: How to Say Goodbye and Mean It|#1]]–[[Liars, A to D Part 3: The Chaos of Warm Things|3]] & [[Life After the Big Bang|#4]]–[[How Ratchet Got His Hands Back|5]], and ''Robots in Disguise'' issues #1–5 & #6. | |||
** Hardcover format. | |||
*''[[ | * '''''Transformers: Robots in Disguise Box Set''''' <small>([[December 2]], [[2015]]) ISBN 1631404261 / ISBN 978-1631404269</small> | ||
*''[[ | ** Collects ''Robots in Disguise'' Volumes 1–5. | ||
** Bonus material unknown at this time. | |||
* '''''[[Transformers: The Definitive G1 Collection]]: Volume 54: A Better Tomorrow''''' <small>([[April 3]], [[2019]])</small> | |||
** Collects ''Robots in Disguise'' issues #1–7. | |||
** Bonus material includes a new interview about the ''Robots in Disguise'' by John Barber. | |||
** Hardcover format. | |||
<gallery> | |||
File:RID vol1.jpg|'''''Robots in Disguise Volume 1''''' – cover art by [[Andrew Griffith]] and [[Josh Perez]] | |||
File:RID vol1 reissue.jpg|'''''Robots in Disguise Volume 1''''' – cover art by [[Livio Ramondelli]] | |||
File:IDWCollectionP2V1.jpg|'''''The IDW Collection Phase Two: Volume 1''''' – cover art by [[Saren Stone]] | |||
File:RID-Box-Set.jpg|'''''Robots in Disguise Box Set''''' – cover art by by ??? | |||
File:DefinitiveG1Collection v54.jpg|'''''The Definitive G1 Collection: Volume 54: A Better Tomorrow''''' – cover art by [[Don Figueroa]] and Andrew Griffith | |||
</gallery> | |||
==References== | |||
{{reflist}} | |||
Latest revision as of 20:48, 12 February 2026
| |||||||||||||

| |||||||||||||
| "Stick Together" | |||||||||||||
| Publisher | IDW Publishing | ||||||||||||
| First published | March 28, 2012 | ||||||||||||
| Cover date | March 2012 | ||||||||||||
| Story by | John Barber | ||||||||||||
| Art by | Andrew Griffith | ||||||||||||
| Colors by | Josh Perez | ||||||||||||
| Letters by | Shawn Lee | ||||||||||||
| Editor | Carlos Guzman | ||||||||||||
| Continuity | 2005 IDW continuity | ||||||||||||
| Chronology | Current era (2012) | ||||||||||||
When mysterious explosions begin going off across Cybertron, Wheeljack and Starscream must put aside their differences to find their source and save Iacon.
Synopsis
[edit]
The Aerialbots arrive at the Decepticon encampment to perform crowd control while Prowl's security forces remove Ratbat's deceased body. Things start to turn ugly when Prowl makes the unfeasible claim that Ratbat committed suicide, and although Starscream backs up the lie, it does little to quell the rowdy Decepticons. Dirge stalks off, sick and tired of the lies and squabbles, but the idealistic Aerialbot Barrel Roll follows him, trying to get him to listen to reason and believing that fliers should stick together. Just as he appears to be getting through to Dirge, a gigantic spontaneous explosion destroys Barrel Roll and several others nearby.
Bumblebee calls on Wheeljack to analyze the mysterious blast, and the scientist is grateful to get out of his workshop and away from an argument over currency exchange between Tappet and Hipotank. As he goes about his work, political tensions are strained even harder: Prowl blames the Decepticons, Metalhawk blames everybody, and Starscream uses the situation to raise issues pertinent to the Decepticons' quality of life. Miffed at Starscream's backhanded altruism, Wheeljack decides to question Dirge, who is recuperating in a medical facility, but the Seeker's fatalistic blame-throwing only serves to aggravate him. Wheeljack's irritation has nothing on Silverbolt's, however: the Aerialbot leader comes storming into the med-bay, blaming Dirge for Barrel Roll's death and seeking revenge. Intent on studying the mystery from all angles before action is taken, Wheeljack is able to throw off Silverbolt's shot and save the Decepticon.
A second explosion occurs during the night just outside the space port, killing thirty-five more Transformers. Again studying the blast crater, Wheeljack is accused by Starscream of failing in his duties because he is only being reactionary, rather than getting ahead of the problem. Wheeljack scoffs when Starscream claims that he could do some real good if he could get the Seekers back together, and begins listing off the dead, arrested, or MIA members of the squad... and has a brainstorm when he gets to Thundercracker. Starscream struggles to follow his explanation: with Cybertron alive once more, the planet is now transmitting energy to its moon, reviving it as well, but because the planet has returned to a prehistoric state, at a time when it had two moons, excess energy is being transmitted that has nowhere to go, coalescing in the atmosphere and superheating it into an explosive burst of plasma akin to ball lightning. Now recognizing what to look for, Wheeljack determines another explosion is coming in the middle of the city. With the blast only minutes away, Starscream scrambles to gather the NAILs in the Decepticons' barracks within the barrel of Kimia's gun, which will be able to resist the temperatures of the blast if Wheeljack is unable to prevent it. Wheeljack, meanwhile, jury-rigs a set of rockets that he launches into low orbit with help from Ironhide, giving the energy charge something to latch on to and allowing it to harmlessly erupt above Cybertron's surface until he can put a permanent satellite in orbit to absorb the energy. Arcee watches the cold explosion overhead, and smiles.
Bumblebee, Prowl, Metalhawk, and the others arrive at Wheeljack's location just as everything is calming down. Starscream thanks Wheeljack for saving them, but Wheeljack is quick to point out to Bumblebee that if he had failed to prevent the explosion, it was Starscream's quick thinking that would have saved the NAILs. On Wheeljack's recommendation, Bumblebee agrees to let Starscream join their government—which causes Silverbolt to blow a fuse and furiously strike the little yellow 'bot. Prowl tries to intervene, but is likewise slapped down by the Aerialbot leader, who gathers his men and announces that they are seceding from Bumblebee's government. As all assembled watch them go, Starscream quietly remarks that fliers should stick together, and Bumblebee realizes that the Decepticon genuinely doesn't want them to go. He apologizes for zapping Starscream the previous day, and Starscream assures him he won't regret his decision.
Featured characters
[edit](Numbers indicate order of appearance.)
| Autobots | Decepticons | NAILs | ||||
|---|---|---|---|---|---|---|
|
|
|
Quotes
[edit]"Skywarp was teleporting a couple hours ago. Maybe some Decepticon can do this."
"Why assume it was a Decepticon?"
"Gee, Metalhawk, every event on every day of the last six million years mostly."
- —Prowl and Metalhawk look for culprits.
"Crony. He called me a crony. Getting called a crony by Starscream is like... It's like a simile I'd use to describe a less obviously ironic thing."
- —Wheeljack
"You're in, Starscream. We need you on our side. And... I'm sorry I zapped you the other day. I should have trusted you."
"Well, the last time an Autobot trusted me, my lies killed thousands of you. So I get where you were coming from."
"Erm..."
"But thanks for the role in our government. I'm sure you won't regret it."
- —Bumblebee gives Starscream the benefit of the doubt and instantly regrets it.
Notes
[edit]Continuity notes
[edit]- Ratbat was found by Mixmaster stabbed through with a sword, with one arm ripped off and the other pinned to a wall, and Prowl thinks he can call that suicide? "A Better Tomorrow" and following issues will make it clear that the Decepticons (and many neutrals) all know Ratbat was really murdered and that this is leaving them disgruntled with the Autobots; Issue #11 hints that Prowl wanted people to know he had whacked the 'con.
- Dirge was last seen in a flashback in All Hail Megatron #7, the events of which he recounts here. While he survived the Insecticon swarm, it doesn't sound like we'll be seeing Deluge again!
- A sky-sled can be spotted mounted on the wall just behind Wheeljack's head in his workshop. This was a fixture of Ironfist's workshop, indicating that Wheeljack accepted the offer to take it over Xaaron said he was going to make back in "Chaos Theory Part 1" (and, of course, that the workshop survived the crash of Kimia).
- Ramjet and Thrust's deaths are mentioned, from Spotlights Ramjet and Prowl respectively.
- Several of the NAILS who die in the second explosion first appeared in the opening crowd scene in issue #1.
- The mysterious loss of one of Cybertron's moons was previously mentioned in More than Meets the Eye #1 and comes up repeatedly in the series.
- A possible explanation for the nature of the energy being released by Cybertron was provided in issue #19 of More Than Meets the Eye.
Transformers references
[edit]- Among the assembled junk in Wheeljack's workshop is: a computer readout of the Kronosphere from "War Dawn", a model of Wheeljack's Cybertronian vehicle mode and a stack of energy conductors from "More than Meets the Eye, Part 1", the green, circular bomb from "More than Meets the Eye, Part 2", the chunk of meteor from "War of the Dinobots", the hypno-chip nullifier from "The Ultimate Doom, Part 3", the two designs of the cosmitron from "Divide and Conquer", the experimental generator from "Masquerade" (basically—and not coincidentally, we wager!—all the stuff Wheeljack is fiddling with in the screencaps included in his article on this wiki!), as well as the Crystal of Power from "Fire on the Mountain", one of Metroplex and/or Trypticon's eyes from "Ghost in the Machine", which are hidden by a speech balloon in the first panel and only vaguely apparent in the second. Also visible is the head of an R5-series droid from Star Wars.
- Colourist Josh Perez continues to color generic characters and objects as homages to other things: the NAIL in the foreground of the medi-bay is colored like the Tonka GoBots character Rest-Q while Wheeljack's rocket launcher is colored to resemble Omega Spreem.
Real world references
[edit]- In page 10, panel 3, Perez colored the bots in the CR chambers after the constituents of the Jungle Fiver combiner from The Bots Master.[1]
Other trivia
[edit]- Unlike the other characters in this series who were in the game, Air Raid does not appear with his War for Cybertron design, instead using a different Cybertronian body based on his Generation 2 Cyberjet stealth bomber form.
- Fixit might seem odd to see amongst the Protectobots on first impression, given that the team has its own medic in First Aid, but at the time, IDW continuity had yet to establish them as even being a team, and in any case, the previous story "Bullets" has established that First Aid is stationed on another planet at the medical facility Delphi.
Foreign localization
[edit]Japanese
- Title: "Te o Tsuna ga Neba" (手を繋がねば, "Need to Join Hands")
Covers (3)
[edit]- Cover A: Wheeljack; art by Andrew Griffith and Josh Perez
- Cover B: Starscream; art by Casey Coller and Joana Lafuente, in homage to Ed McGuinness's cover to Superman #154. (see here)
- Cover RI: Black and white lineart version of Cover A by Andrew Griffith
-
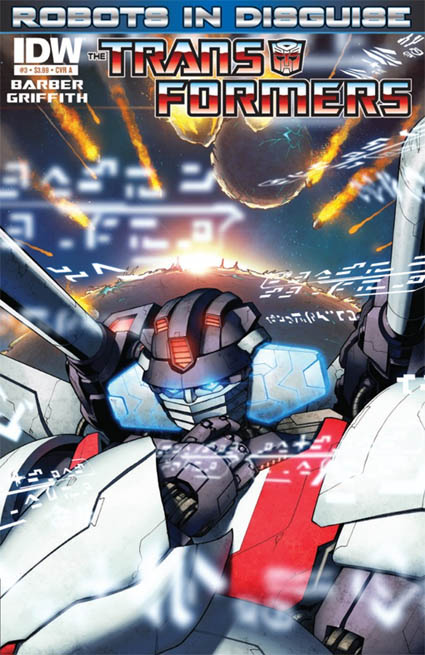 The Thinker
 -
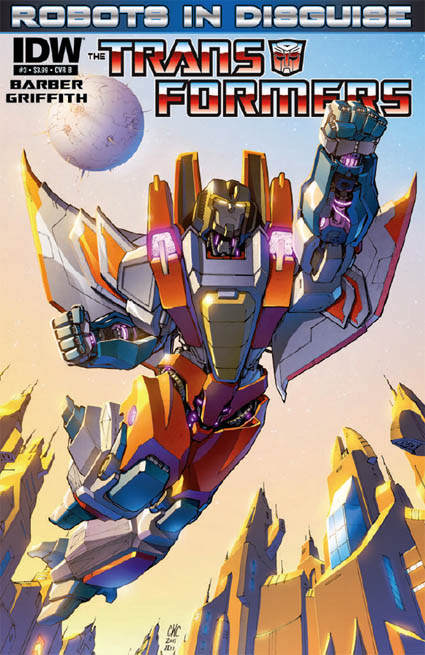 The Stinker
 -
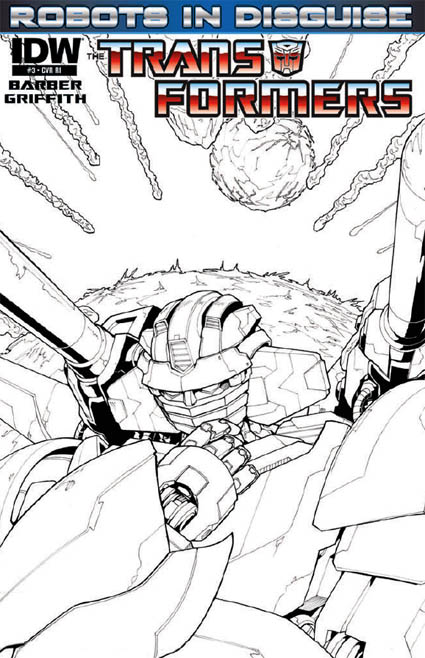 Cover RI


Advertisements
[edit]- The Transformers: More than Meets the Eye #4
- Infestation 2: G.I. Joe and Teenage Mutant Ninja Turtles
- Shout! Factory Transformers DVDs
- Free Comic Book Day
- The Transformers: Autocracy
- Rocketeer Adventures 2
Reprints
[edit]- The Transformers: Robots in Disguise Volume 1 (July 25, 2012) ISBN 1613772912 / ISBN 978-1613772911
- Collects Robots in Disguise issues #1–5.
- Bonus material includes art from most covers and notes on issue #3 by the author/artists.
- Trade paperback format.
- The Transformers: Robots in Disguise Volume 1 (Reissue) (May 21, 2014) ISBN 161377964X / ISBN 978-1613779644
- Collects Robots in Disguise issues #1–5.
- New cover by Livio Ramondelli.
- Bonus material includes cover gallery and notes on issue 3 by Barber, Griffith, and Josh Perez.
- Trade paperback format.
- The Transformers: The IDW Collection Phase Two: Volume 1 (September 3, 2014) ISBN 1631400401 / ISBN 978-1631400407
- Collects The Death of Optimus Prime, More than Meets the Eye issues #1–3 & #4–5, and Robots in Disguise issues #1–5 & #6.
- Hardcover format.
- Transformers: Robots in Disguise Box Set (December 2, 2015) ISBN 1631404261 / ISBN 978-1631404269
- Collects Robots in Disguise Volumes 1–5.
- Bonus material unknown at this time.
- Transformers: The Definitive G1 Collection: Volume 54: A Better Tomorrow (April 3, 2019)
- Collects Robots in Disguise issues #1–7.
- Bonus material includes a new interview about the Robots in Disguise by John Barber.
- Hardcover format.
-
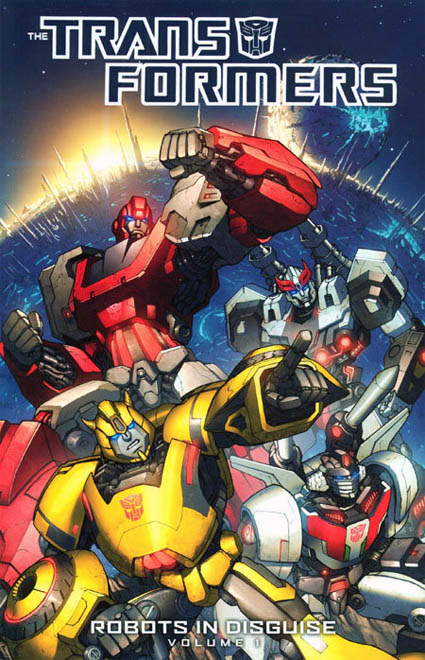 Robots in Disguise Volume 1 – cover art by Andrew Griffith and Josh Perez
 -
 Robots in Disguise Volume 1 – cover art by Livio Ramondelli
 -
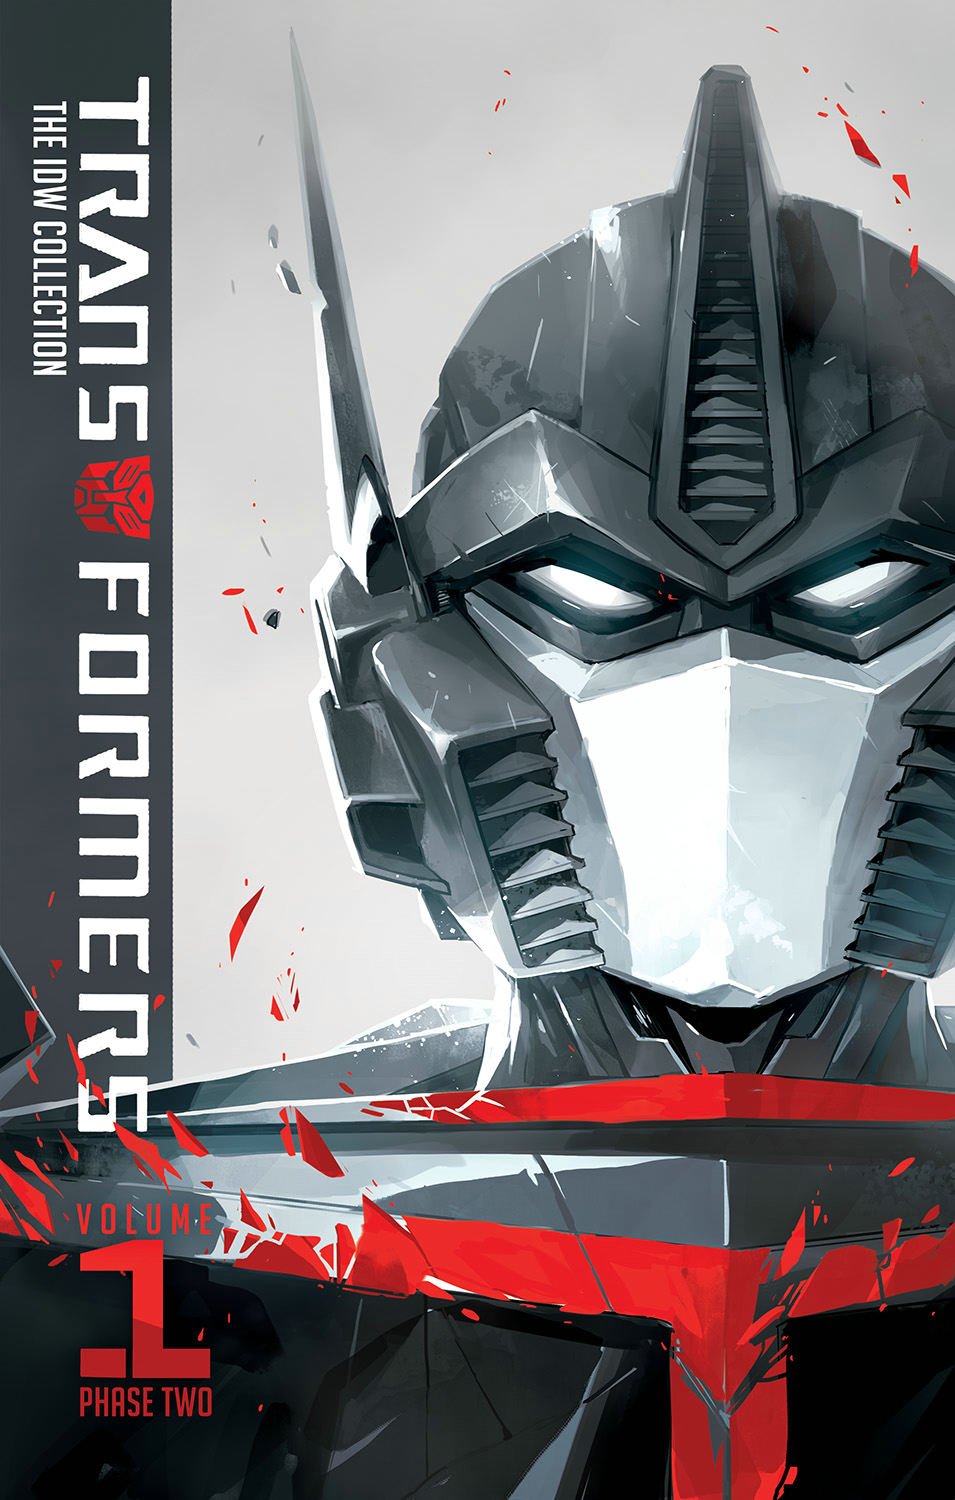 The IDW Collection Phase Two: Volume 1 – cover art by Saren Stone
 -
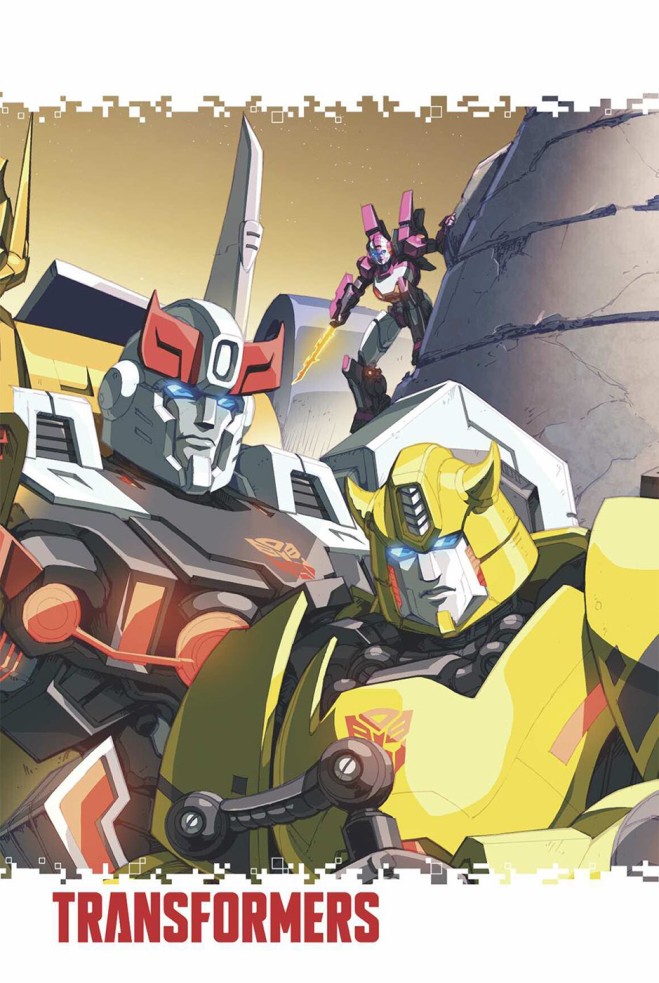 Robots in Disguise Box Set – cover art by by ???
 -
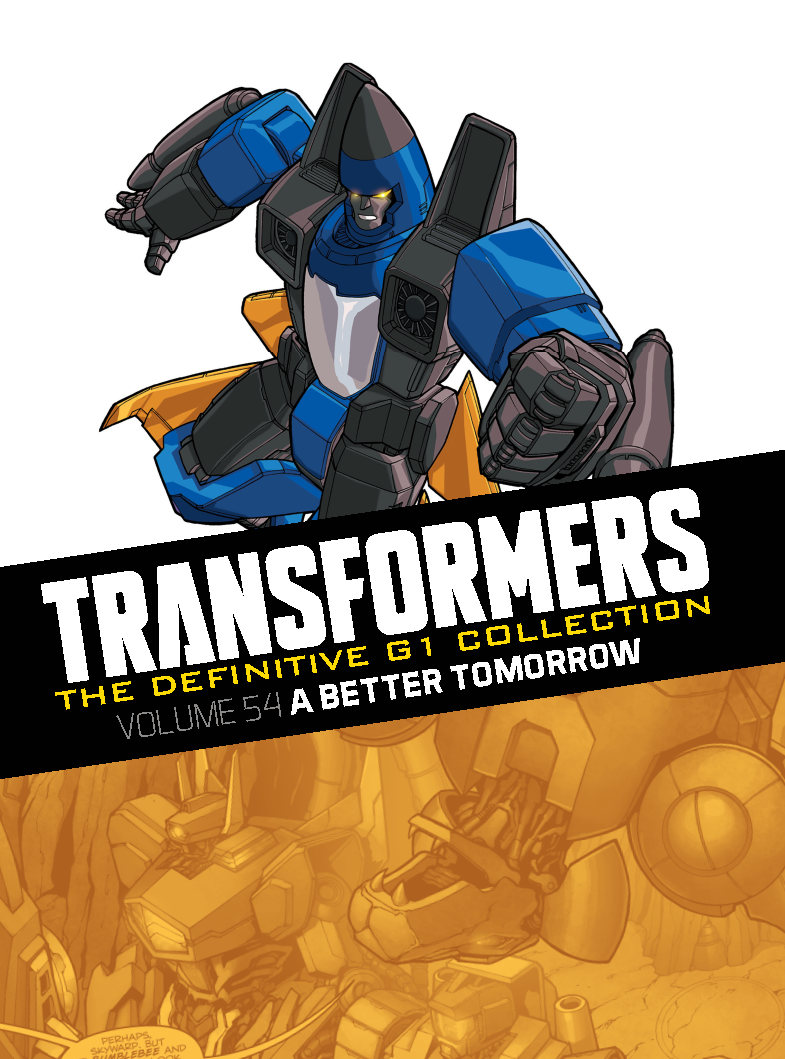 The Definitive G1 Collection: Volume 54: A Better Tomorrow – cover art by Don Figueroa and Andrew Griffith


References
[edit]- ↑ "I forget if it was this issue or another, but the bots in the CR Chambers were homages to Jungle Fiver from Bots Masters XD ((looked it up, it's this issue lol)"—Josh Perez, Twitter, 2019/08/02


