The Art of War issue 5
| |||||||||||||
 Arise, Hawktimus Prime. | |||||||||||||
| Publisher | Devil's Due Press | ||||||||||||
| First published | August 30, 2006 | ||||||||||||
| Cover date | July 2006 | ||||||||||||
| Script | Tim Seeley | ||||||||||||
| Pencils | Alex Milne, Joe Ng, & James Raiz | ||||||||||||
| Inks | Rob Ross | ||||||||||||
| Colors | Rob Ruffolo & Kevin Yan | ||||||||||||
| Letters | Brian Crowley | ||||||||||||
| Editor | Mike O'Sullivan | ||||||||||||
| Continuity | G.I. Joe vs. the Transformers continuity | ||||||||||||
The Autobots and G.I. Joe fight on Cybertron against the reunited Decepticons, while Serpent O.R. makes contact with the Matrix.
Synopsis
[edit]Having escaped from his chains, Optimus Prime attacks Serpent O.R. Prime has a strong advantage, being much larger than Serpent O.R., but several Decepticons, including Motormaster and Razorclaw, rush to the aid of their leader. While Prime individually fights off his attackers, a recovering Serpent O.R. notices a wound in the back of his neck.
Outmatched by his opponents' combined might, Prime signals Hot Rod to attack. Now joined by the forces of G.I. Joe, the Autobots storm the Decepticon base.
Inside, Perceptor and Hawk's group defend themselves. Overkill attempts to consume Hawk, but is disabled when Snake-Eyes blinds him. Grimlock proceeds to beat Prime's location out of Runamuck.
With Prime almost beaten to death, Serpent O.R. calls off the Decepticons and uses his tendrils to pry open Prime's chest and steal the power of the Matrix, which he feels will grant himself the spark of life.
Outside, the Decepticons continue to fight the Autobots and G.I. Joes. In the midst of the battle, Duke and Hot Rod see the light of the opened Matrix shine from the Decepticon base.
Serpent O.R., having accessed the Matrix, arises as the robotic Serpentor Prime. Regretting the military actions he has taken to bring himself to this point, he takes Motormaster's gun so that he can kill himself. But before he can fire upon himself, his body is appropriated by Cobra Commander, using the device placed on Serpent O.R's neck to gain remote control of Serpentor Prime.
Hawk and Perceptor's party of soldiers arrives to aid Optimus and engage in combat against the Cobra-controlled Serpentor Prime. Grimlock and Roadblock are knocked aside, but Arcee is able to remove a piece from Serpentor Prime's chest. With an opening presented, Optimus literally tosses Hawk towards Serpentor. Hawk hopes for the best as he grabs the Matrix away from Serpentor Prime. His eyes opened to the universe, both Serpentor Prime and Hawk fall inert. Lady Jaye and Hot Rod arrive to announce that the Decepticons have fallen.
Cobra Commander, still strapped into the machine that let him control Serpentor Prime, is catatonic.
Back on Cybertron, the Autobots rebuild. Scarlett and Snake-Eyes flirt while Grimlock concedes that G.I. Joes are valiant warriors. A mourning Hot Rod, Arcee, and Ultra Magnus attend a memorial for Bumblebee. Optimus Prime, having reclaimed the Matrix and been repaired, makes an entry into his log. He anticipates that the G.I. Joes and Autobots will continue to defend their respective civilizations, and that Hawk, now connected to the Matrix, will lead humanity to a new golden age.
Featured characters
[edit](Numbers indicate order of appearance.)
| Autobots | Decepticons | G.I. Joe | Cobra | Others |
|---|---|---|---|---|
|
|
|
|
Notes
[edit]- The image of a human soldier on the final page of an issue is a picture of Sgt. Savage fighting Iron Klaw. The two were the central characters on the series G.I. Joe Extreme, a mid-'90s attempt to reinvigorate the G.I. Joe license. As the previous image was later used in Volume 4's Black Horizon, this may have been a planned fifth volume. With the loss of the license to IDW, we'll probably never know.
- A decade later, we would find out some of the details in an entry of the Andromeda Facebook page
Errors
[edit]- On the page featuring the Autobots and the Joes readying to assault Serpent O.R. and the Decepticons, where the Joes are shouting "Yo Joe!", Prowl is miscolored as Sideswipe.
Covers (3)
[edit]- Cover A: Hawk with the Matrix, surrounded by Decepticons by Joe Ng, Espen Grundetjern and Tom Liu. Combines with the Cover A variant covers for issues 1–5 to form a single image.
- Cover B: Joes and Autobots by Steven Cummings & Rob Ruffolo.
- UDON Exclusive Cover: Megatron, Shockwave and Cobra by Joe Ng: Available at Conventions and on the Club Udon website. Combines with Club Udon variant covers for issues 1–5 to form a single image.
-
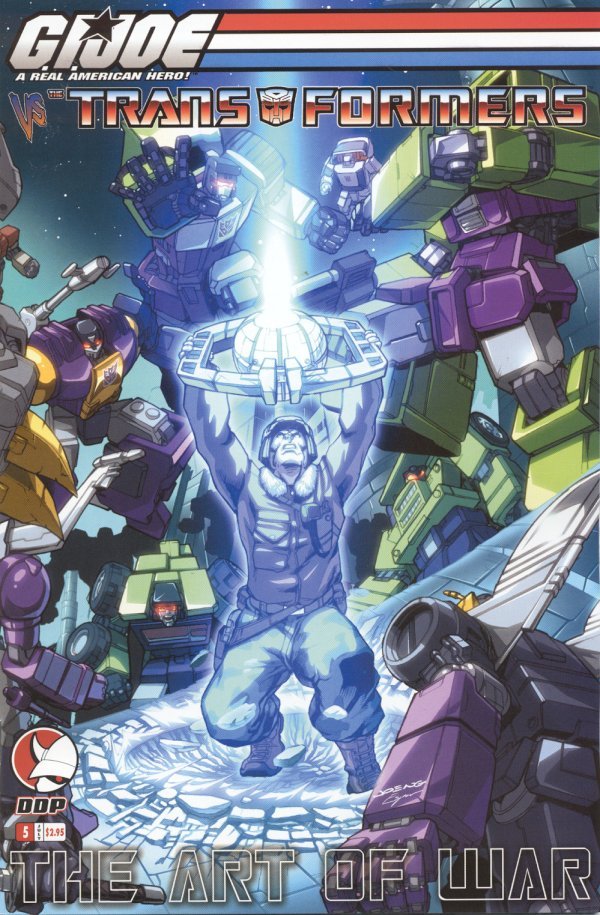 Arise, Hawktimus Prime.
 -
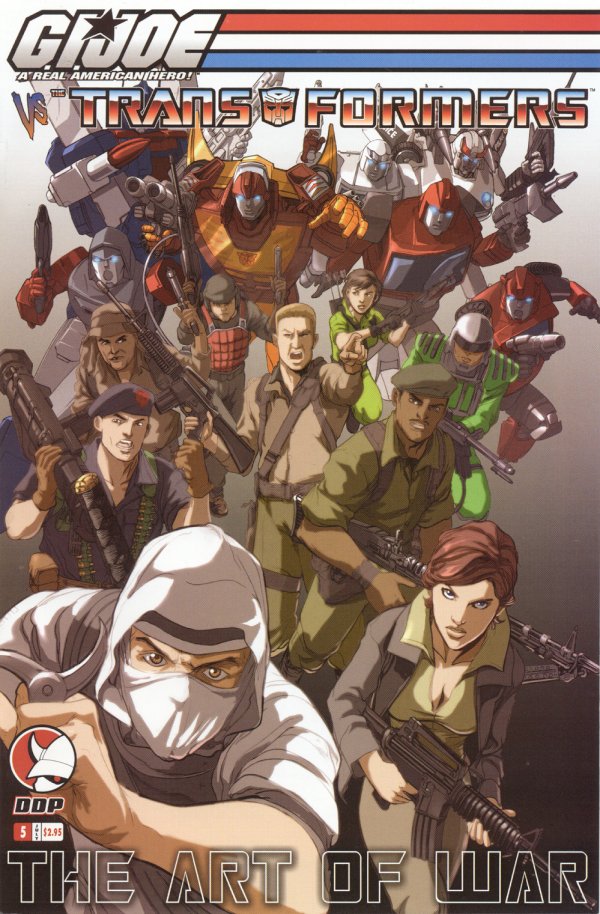 Joes'n'Bots
 -
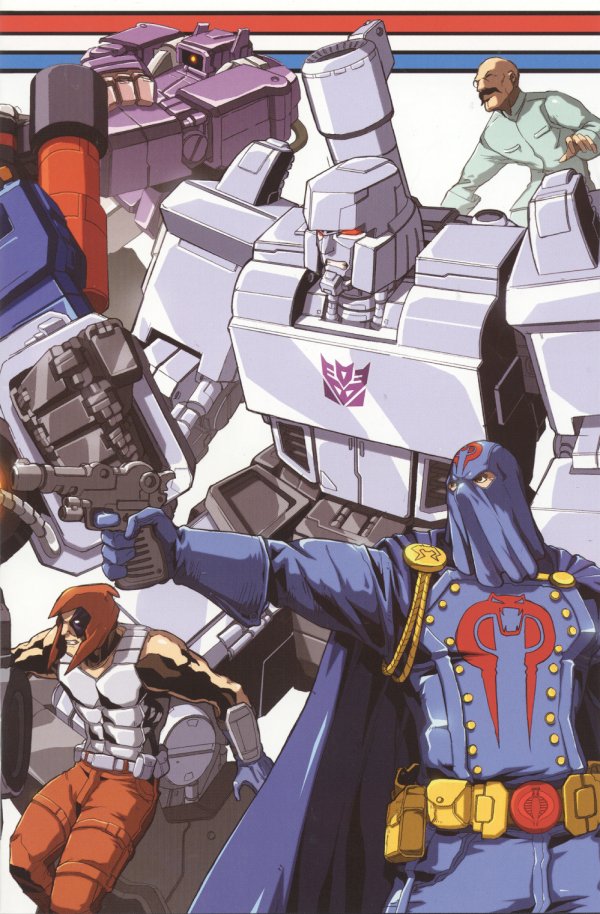 Who can unite Megatron and Shockwave? Cobraaaaaaaa!


Advertisements
[edit]- Dungeons & Dragons
- Cobra Commander bust
- Dragonlance Chronicles: Dragons of the Dwarven Depths #1
- Dragonlance Chronicles: Dragons of Winter Night #2
- Forgotten Realms' Crystal Shard #2
- Nightwolf: The Price #2
- G.I. Joe Special Missions: Tokyo
- G.I. Joe #15
- G.I. Joe Declassified #3
- G.I. Joe: Sigma 6 TPB
- G.I. Joe vs. the Transformers: The Art of War TPB
- G.I. Joe: Phoenix Guard
- Forgotten Realms' Crystal Shard #1
- DDP Quarterly
- Eberron #1
- Devil's Due's RIPPED OFFer
- G.I. Joe comic featuring the Baroness (back cover)
Reprints
[edit]Other than collections of the full series
- Transformers: The Definitive G1 Collection: Volume 97: G.I. Joe vs Transformers, Part 3 (September 23, 2020)
- Collects The Art of War issues #3–5 and both issues of Black Horizon
- Bonus material includes a cover gallery and an intro by Simon Furman.
-
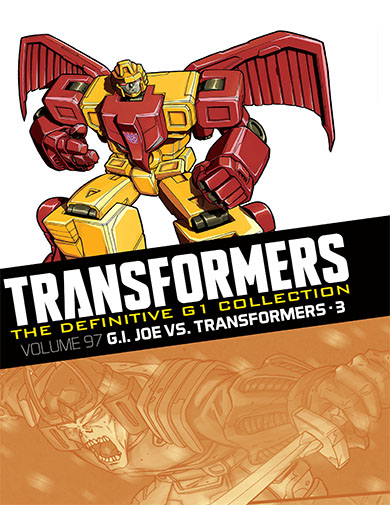 Definitive G1 Collection Vol. 97: G.I. Joe vs Transformers, Part 3;
art by Dreamwave (Wildfly) and Andrew Wildman


